 gighive
Database Import Process
Using the standard upload process (upload utility or iPhone app), Gighive will accumulate new media and store the metadata for each file into its database. But you can also preload video and audio files into the database via comma-quote (CSV) file format. This would be useful if you have a preexisting library of media, say for a band that has been around for a long time. This document explains how GigHive imports CSV data into the MySQL database, including the data transformation pipeline and configuration options, so if you have such a cache of media files, you will be able to upload them with ease.
Overview
GigHive uses a multi-step process to transform a single source CSV file into normalized database tables. This process handles session data, musicians, songs, and media files while maintaining referential integrity.
Format
The source CSV file contains the following fields:
- t_title* - Session title (mandatory)
- d_date* - Session date in YYYY-MM-DD format (mandatory)
- t_description_x - Session description
- t_image - Cover image URL/path
- d_crew_merged* - Comma-separated list of musicians (mandatory)
- v_location - Session location/venue
- v_rating - Session rating
- v_jam summary - Session summary text
- v_pubDate - Publication date
- v_explicit - Explicit content flag (true/false)
- v_duration - Session duration
- v_keywords - Comma-separated keywords
- d_merged_song_lists* - Comma-separated list of songs performed (mandatory)
- f_singles - Comma-separated list of media files
- l_loops - Comma-separated list of loop files
Fields marked with asterisk () are mandatory for proper database import.
Process Flow
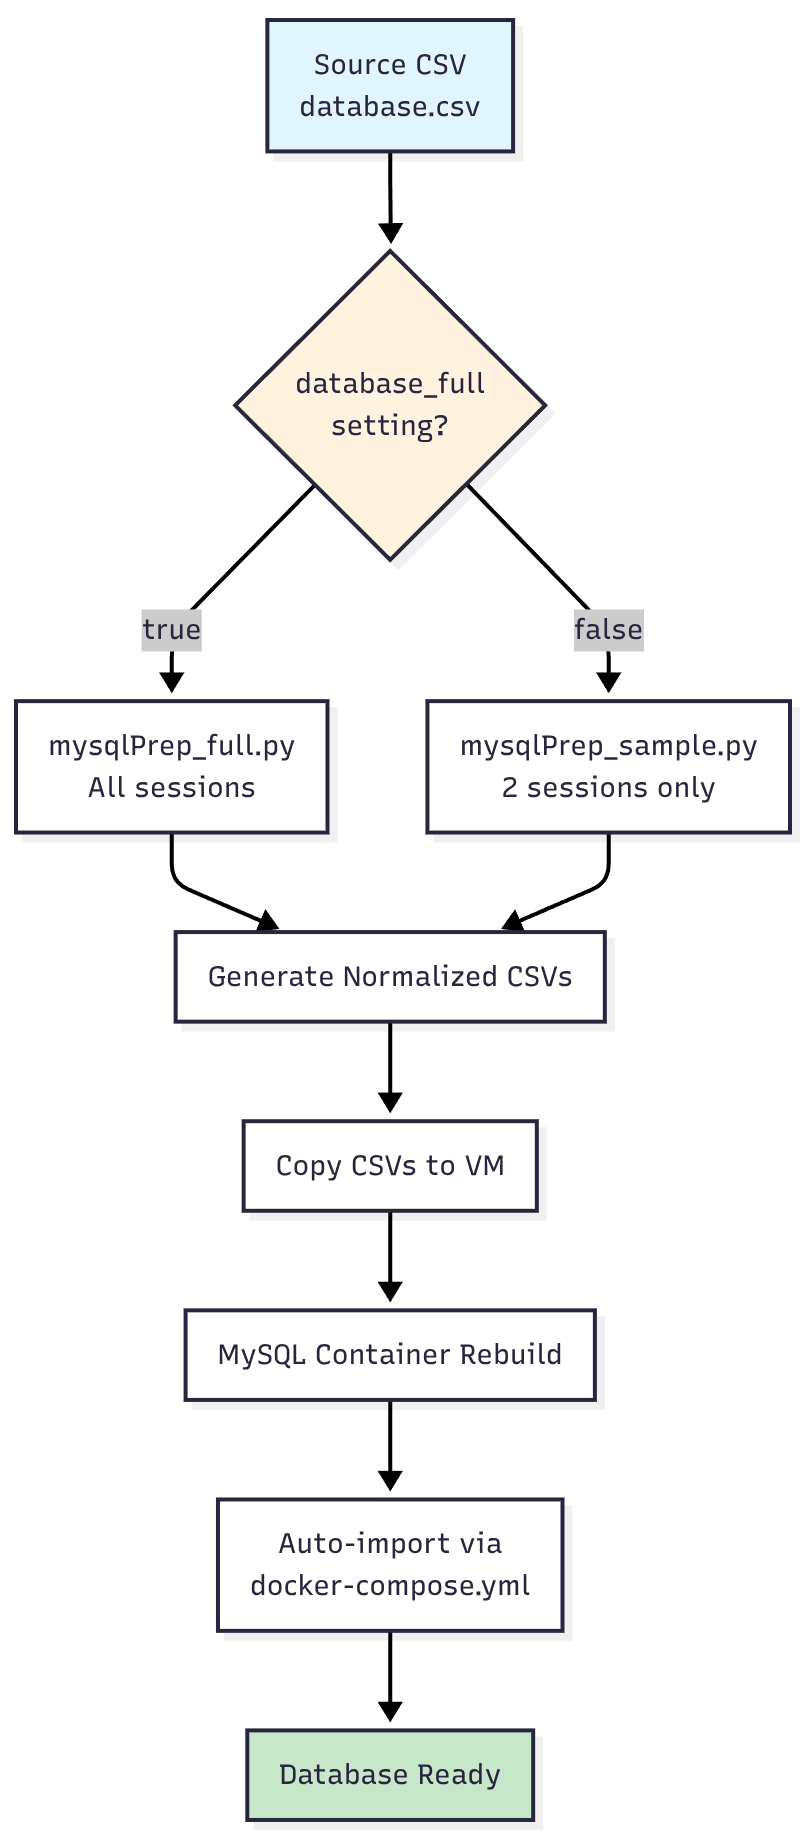
Configuration
Database Size Selection
You have the option to load a full database or just a sample database. While this option most likely won’t be used, know that you have that ability. The import process is controlled by the database_full variable in your inventory group vars file:
File: $GIGHIVE_HOME/ansible/inventories/group_vars/gighive.yml
# app flavor for build-time overlay; database_full kept as-is
app_flavor: gighive
database_full: false  # Set to true for full dataset, false for sample
database_full: true→ UsesmysqlPrep_full.py(processes all sessions)database_full: false→ UsesmysqlPrep_sample.py(processes only 2 sessions: 2002-10-24 and 2005-03-03)
File Locations
Source Data
- Source CSV:
$GIGHIVE_HOME/ansible/roles/docker/files/mysql/dbScripts/loadutilities/database.csv
Processing Scripts
- Full Dataset:
$GIGHIVE_HOME/ansible/roles/docker/files/mysql/dbScripts/loadutilities/mysqlPrep_full.py - Sample Dataset:
$GIGHIVE_HOME/ansible/roles/docker/files/mysql/dbScripts/loadutilities/mysqlPrep_sample.py - Driver Script:
$GIGHIVE_HOME/ansible/roles/docker/files/mysql/dbScripts/loadutilities/doAllFull.sh
Output Directory
- Generated CSVs:
$GIGHIVE_HOME/ansible/roles/docker/files/mysql/externalConfigs/prepped_csvs/full/
Docker Configuration
- Template:
$GIGHIVE_HOME/ansible/roles/docker/templates/docker-compose.yml.j2 - Rendered:
$GIGHIVE_HOME/ansible/roles/docker/files/docker-compose.yml(on VM)
Data Transformation Process
CSV Preprocessing
The Python scripts transform the single source CSV into multiple normalized tables:
Input: database.csv
Single CSV with columns for sessions, musicians, songs, and files all in one row per session.
Output: Normalized CSVs
sessions.csv- Session metadata (date, location, crew, etc.)musicians.csv- Unique musician names with IDssession_musicians.csv- Many-to-many relationship between sessions and musicianssongs.csv- Unique songs with IDs (⚠️ Critical Fix Applied)session_songs.csv- Many-to-many relationship between sessions and songsfiles.csv- Media files (audio/video) with metadatasong_files.csv- Many-to-many relationship between songs and filesdatabase_augmented.csv- Original CSV with added columns for reference
Import Process Steps
Manual Process
- Edit Source Data
# Edit the source CSV vim $GIGHIVE_HOME/ansible/roles/docker/files/mysql/dbScripts/loadutilities/database.csv - Configure Database Size
# Edit inventory file vim $GIGHIVE_HOME/ansible/inventories/group_vars/gighive.yml # Set database_full: true or false - Generate Normalized CSVs
cd $GIGHIVE_HOME/ansible/roles/docker/files/mysql/dbScripts/loadutilities # Run the appropriate script based on database_full setting python3 mysqlPrep_full.py # if database_full: true # OR python3 mysqlPrep_sample.py # if database_full: false - Deploy to VM
# Ansible copies files and restarts containers ansible-playbook -i inventories/inventory_azure.yml playbooks/site.yml - Rebuild Containers
# On the VM host
cd $GIGHIVE_HOME/ansible/roles/docker/files
./rebuildForDb.sh
The MySQL startup process will automatically consume the import files.
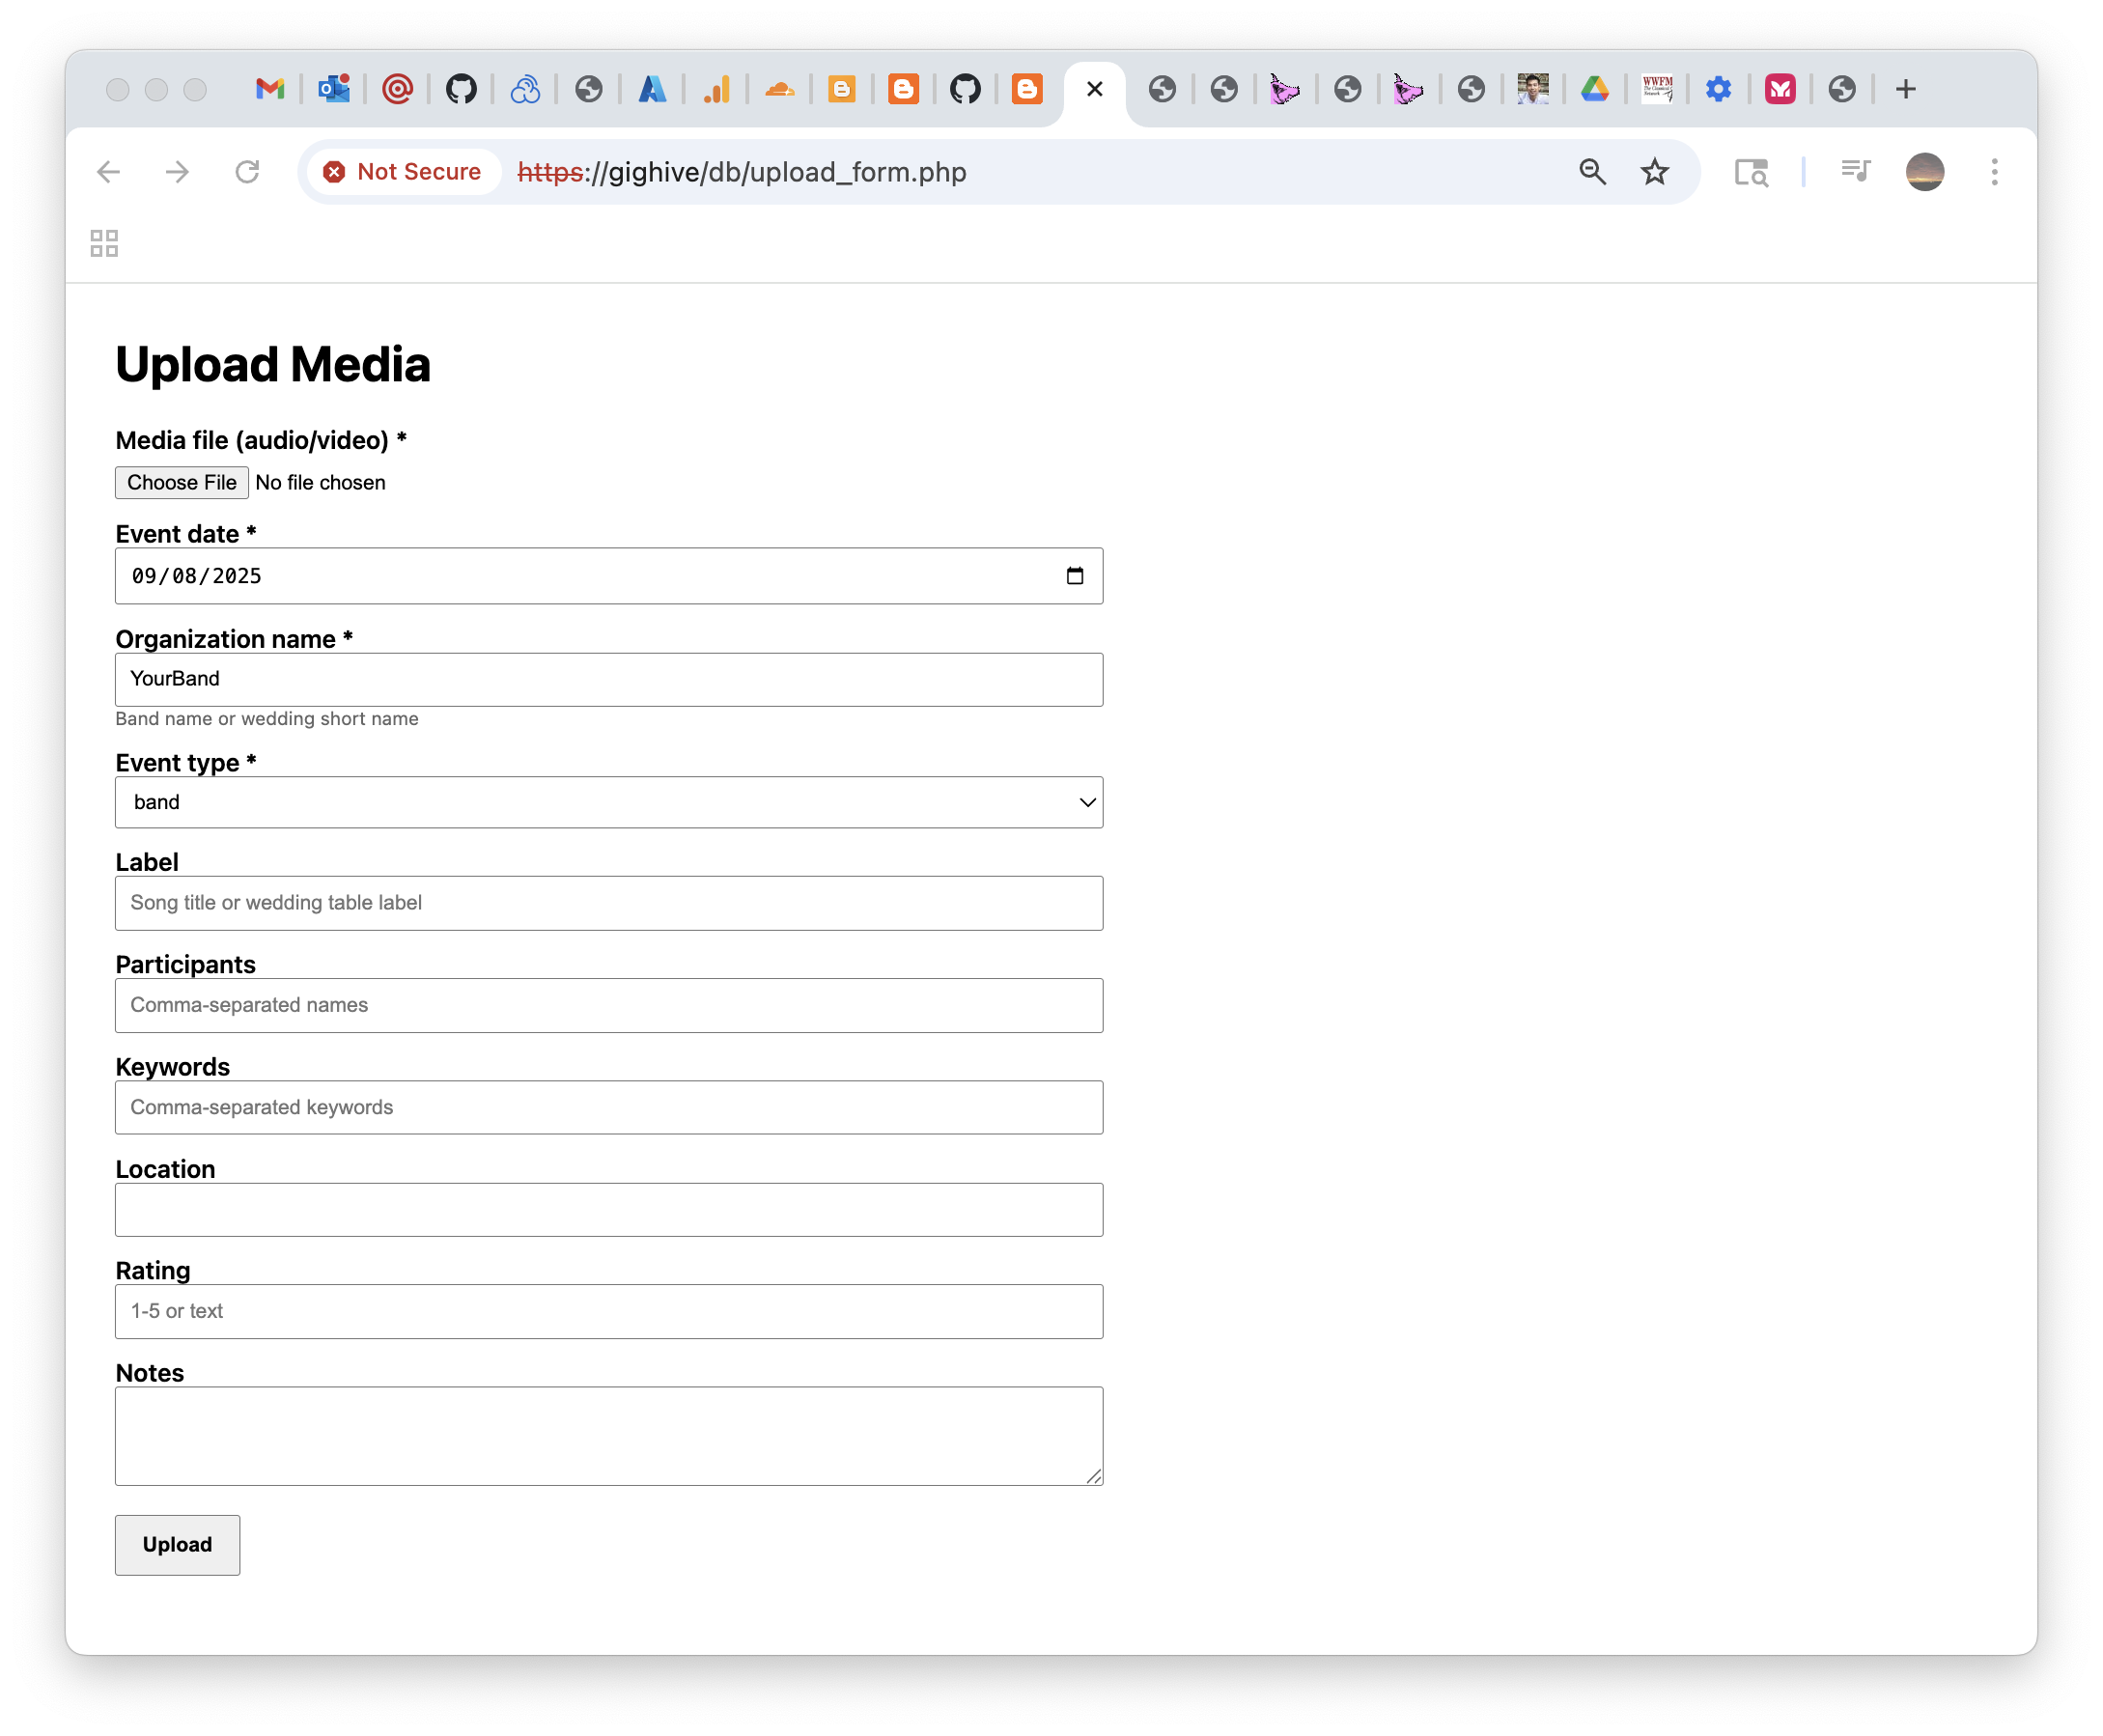
- Visit the db/database.php link to see the changes.
Automated Process
The entire process is automated through Ansible:
- Ansible determines which script to use based on
database_fullsetting - Runs preprocessing script to generate normalized CSVs
- Copies files to VM host
- Restarts MySQL container which triggers auto-import
- MySQL imports all CSV files on container startup
Database Schema
The import process creates the following table relationships:

Troubleshooting
Common Issues
- Missing Files in Output
- Check: Ensure files are listed in the
f_singlescolumn of source CSV - Check: Verify file extensions are supported (mp3, mp4, etc.)
- Check: Ensure files are listed in the
- Import Fails
- Check: CSV syntax and encoding (UTF-8)
- Check: MySQL container logs for specific errors
- Check: File permissions on CSV files
Validation
After import, verify data integrity by executing the following SQL on the MySQL container:
-- Check for duplicate song associations (should be none after fix)
SELECT f.file_name, s.title, sess.date, sess.title as session_title
FROM files f
JOIN song_files sf ON f.file_id = sf.file_id
JOIN songs s ON sf.song_id = s.song_id
JOIN session_songs ss ON s.song_id = ss.song_id
JOIN sessions sess ON ss.session_id = sess.session_id
WHERE f.file_name LIKE '%19971230_2%'
ORDER BY sess.date;
Best Practices
- Gighive has an automated nightly backup procedure that will backup the data in the database to this directory on the VM host:
$GIGHIVE_HOME/ansible/roles/docker/files/mysql/dbScripts/backups - Review the sample dataset to see how it is structured. Map each field you see in the file to the schma above so that you know how the data should appear in your version of the file.
- Test with sample dataset (
database_full: false) before full import - Verify file associations after import using the validation query above
- Use consistent naming for media files (date_track format recommended)
- Keep track of changes in the source CSV for audit purposes
- Don’t forget your media! You will need to copy it to the default directory for media, usually:
$GIGHIVE_HOME/assets/videoand$GIGHIVE_HOME/assets/audio
Security Notes
- CSV files may contain sensitive session information
- Ensure proper file permissions on the VM
- Database credentials are managed through Ansible vault in production
- Media file paths may expose directory structure
This documentation reflects the current state after applying the critical fix for unique song IDs per session.